|
Note: This is a detailed description of this step, which is displayed when you create or duplicate a search profile. You can find the main instructions here: |
Section > field |
Information |
Element Information > BIS IS Datastore ID |
It is mandatory to select the Element that the search should be based on (which corresponds to the content of the Message Tracking table). The following elements are supported in Message Tracking: |
Element Information > Details |
If you want to see which columns are accessible in detail, click the button Details to the right of the dropdown Element. |
Profile Information |
The user who creates a search profile is automatically stored in the section Profile Information belonging to that search profile. |
Section > field |
Information |
Common > Technical Name |
In the section Common, enter a Technical Name. The name must be unique within your client (logical system). |
Common > Description |
Provide a Description for this profile. |
Common > Menu Caption |
Define the name for the search to be displayed in the menu on the left. Note that this value is limited to 30 characters. |
Common > Detail Caption |
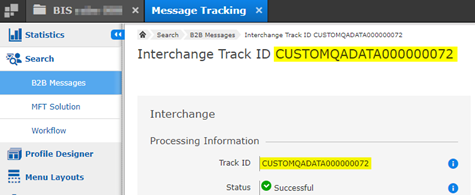
In the section Detail Page, specify the heading of the page of a search result. Here, you can work with variables. For example, entering "Interchange Track ID ##BISMTOlsWf.bismtWfWfId#" will display the value from BISMTOlsWf.bismtWfWfId in the heading on the detail page (see example below). This part between the leading ## and closing # will be dynamically inserted. The same will also be used for the overview caption automatically. |
Menu > Menu visibility |
This checkbox controls whether a search profile should be displayed in the menu. If you want to make the search profile visible in the menu, you must activate this checkbox. |
Example for Detail Page > Detail Caption:
Section > field |
Information |
Features |
The checkbox Enable Export must be checked to see the button Create Export in the search result and use this export function. Also, the checkbox needs to be checked, to be able to use the search profile as the basis for an export. |
Features > Enable Automations |
If you have booked the add-on Automation, the checkbox Enable Automation must be checked to display the button Create automation in the search results. Also, the checkbox needs to be checked, to be able to use the search profile as the basis for an automation when creating automations. |
Features > Advanced Search |
If you have booked the add-on Advanced Search, the checkbox Enable Advanced Search must be checked to make this profile use the SPAS index. Only available for the BISMTOlsWf or Worfklow. |
Detail Page > Detail Page Layout |
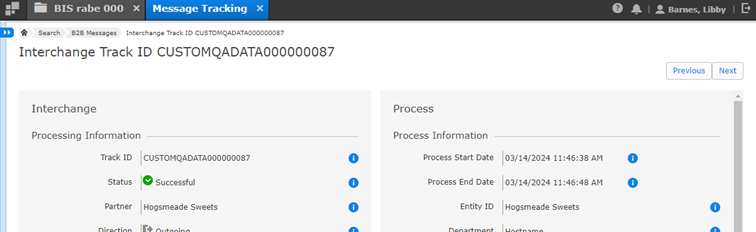
Use the value of the drop-down Detail Page Layout to specify whether the details of the search results should be displayed in one or two columns. An example of a two-column results page is shown below. |
Example for Detail Page > Detail Page Layout of a two-column page:
Find more information here:


